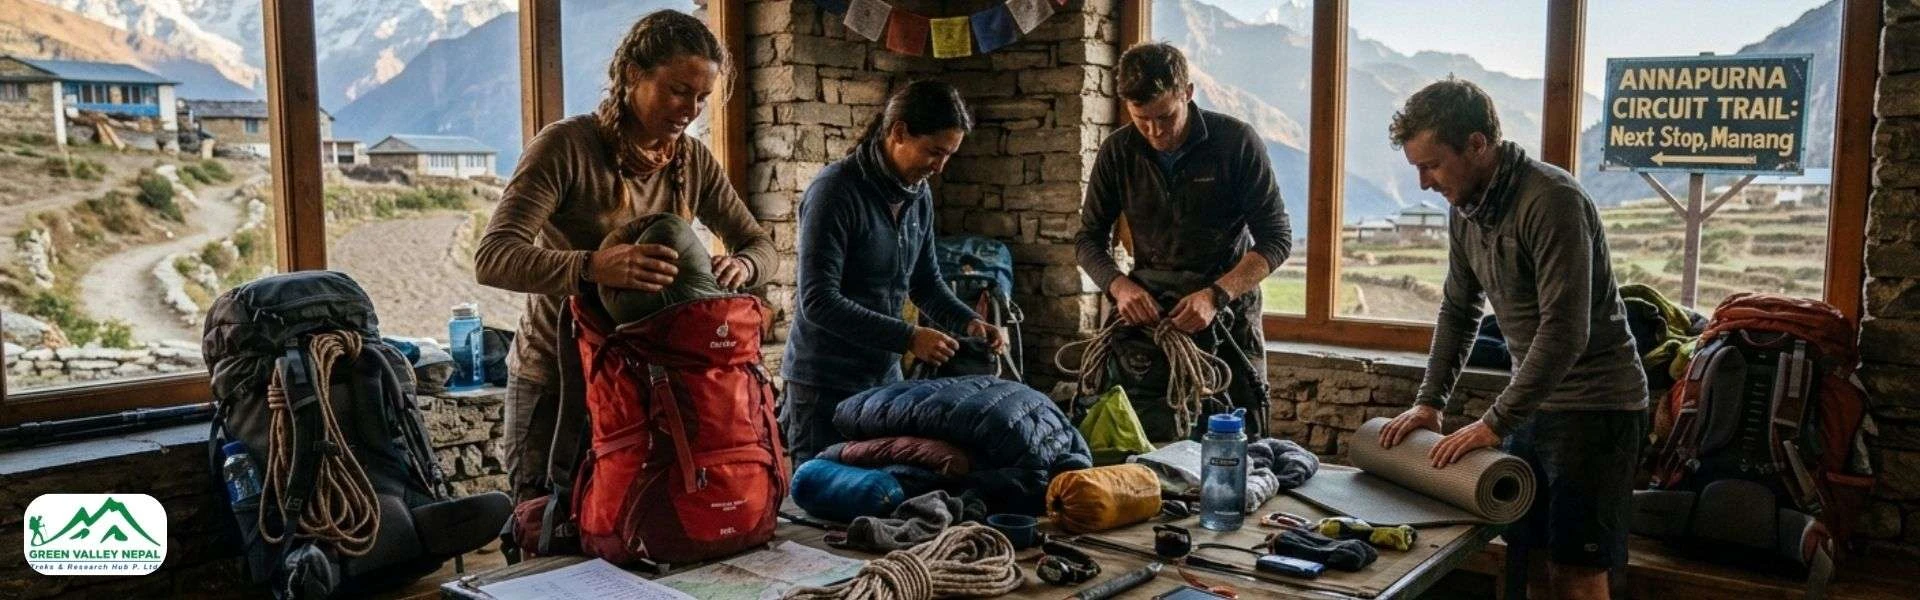
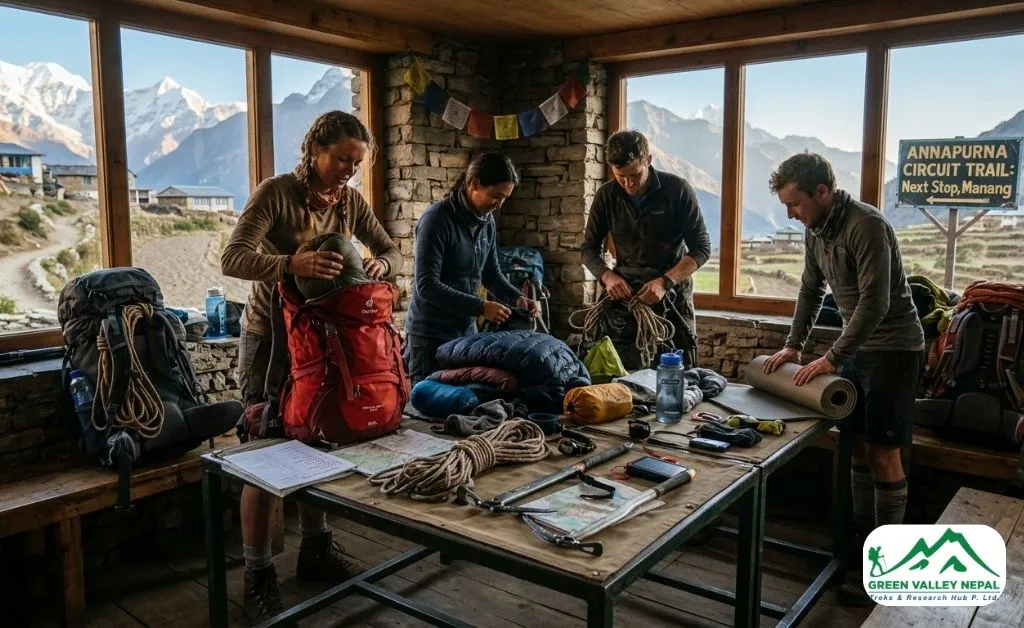
Duffel Bag and Daypack: How the Carrying System Works
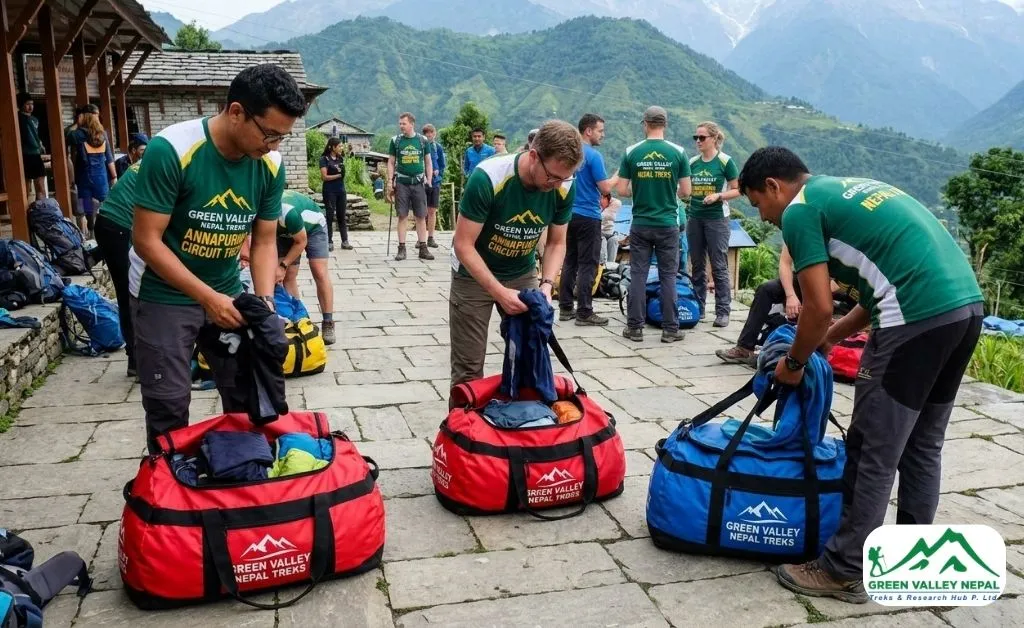
If you are trekking with a guide and porter, which is how most people do the Annapurna Circuit, and how we run every Green Valley trip, you are working with two separate bags, and mixing them up is the single most common packing mistake we see.
- Duffel bag (porter bag). Everything you don’t need during the walking day: spare clothing, your sleeping bag, down jacket for later, toiletries, goes into a soft duffel that your porter carries. The standard weight limit is 15kg per client; this isn’t a soft guideline, it’s what keeps a porter’s job sustainable and is also the checked baggage allowance on the Pokhara–Jomsom flight sector if your itinerary includes it. Choose a duffel with sturdy double zippers you can loop a small lock through; porters move fast over rough ground, and a bag with weak seams or a flimsy zip is the one that gets left in pieces on the trail.
- Daypack. This stays on your own back all day, every day. A 25–35 litre pack is the right range, big enough for a rain shell, 2 litres of water, snacks, camera, sunscreen, and a spare layer, small enough that you are not tempted to overfill it. Look for a hip belt (it shifts weight off your shoulders on long uphill days), a chest strap, and hip-belt pockets you can reach without stopping to dig through the main compartment. A rain cover, built-in or separate, is non-negotiable; afternoon cloudbursts above 3,000m are common even in the driest months, and a soaked daypack means soaked electronics and documents.
If you are trekking independently without a porter, you will need one larger pack instead: 50–65 liters, carrying everything yourself. In that case, weight discipline matters even more: every extra layer is one you personally haul over Thorong La.
Clothing: The Layering System for the Annapurna Circuit
Base layers
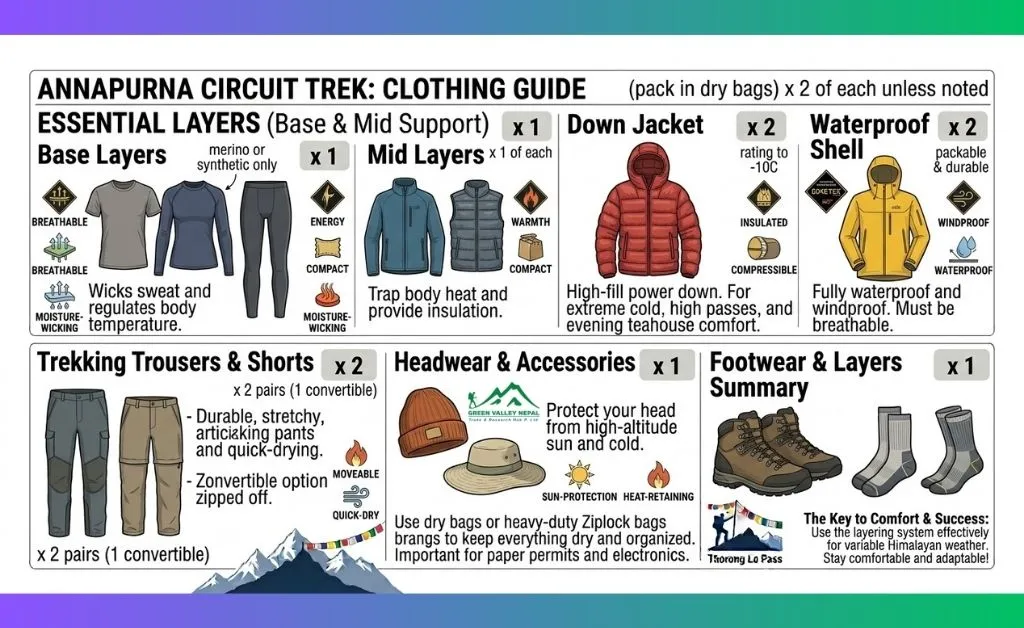
Two sets of moisture-wicking thermal tops and bottoms. Merino wool is the standard recommendation for a reason: it regulates temperature across a wide range, dries reasonably fast, and doesn’t hold odour the way synthetics do after several days without a wash. Synthetic base layers are a fine, cheaper alternative if you don’t mind re-wearing them. Avoid cotton entirely; once it’s damp with sweat, it stays damp, and damp clothing at altitude is how people get cold fast.
Mid-layer
A 200-weight fleece or a 600-fill-power down sweater is your everyday warmth layer for cold teahouse evenings and the hours before a pass crossing. Choose a zip-neck or full-zip design; you will be adding and shedding this layer constantly as the trail climbs and drops.
Down Jacket
Separate from your mid-layer. Above Manang, temperatures fall sharply after sunset. At Thorong High Camp (4,994m), where most trekkers spend the night before crossing the pass, it regularly drops below -10°C even in peak autumn and spring. A packable down jacket that compresses into its own pocket keeps this bulky item manageable. Trekking in winter (December–February)? Upgrade to at least 700-fill power.
Waterproof shell
A waterproof, windproof jacket with a hood, worn over everything else, in every season. Even in the “dry” autumn window, afternoon clouds build above 3,000m and bring sudden hail or heavy rain. Try the jacket on over your full layering system before you leave home; a shell that’s too tight to fit over a down jacket is a shell you won’t use when you need it most. Waterproof trousers are the item people skip, and then regret; a lightweight pair weighs almost nothing and saves an entire day of misery in a downpour.
Trekking Trousers
Two to three pairs of quick-dry trekking trousers. Convertible zip-off styles earn their keep here; the lower Marsyangdi Valley is warm enough for shorts in autumn and spring, while the upper circuit needs full coverage every single day.
Accessories for Annapurna Circuit Trek
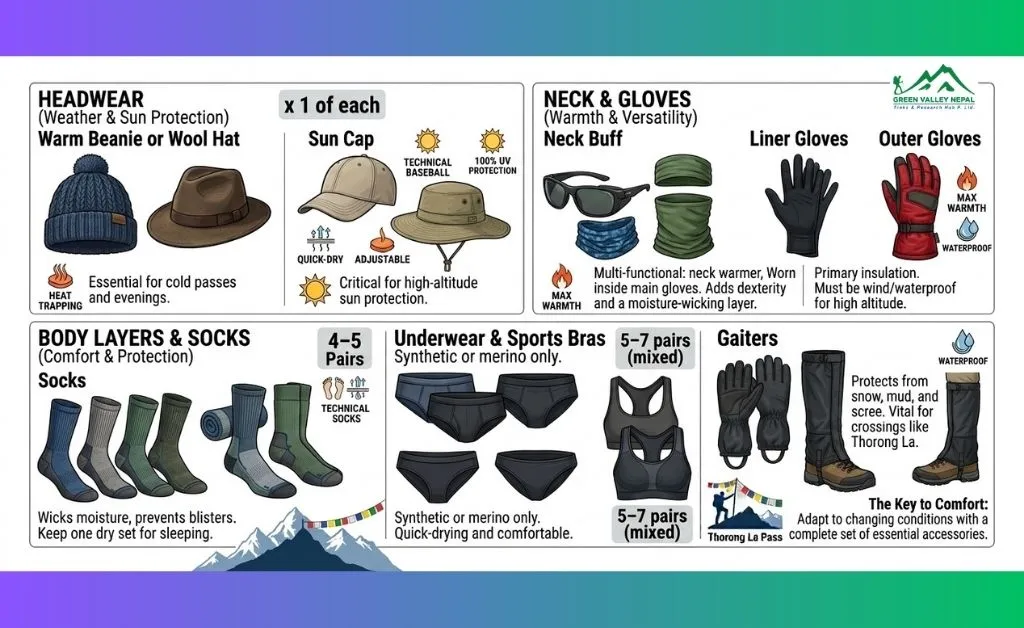
- Warm Beanie or Wool Hat: Essential at altitude and for cold nights in Manang or Thorong Phedi.
- Neck Buff: Doubles as an ear warmer, dust mask, or improvised balaclava; more versatile than a scarf.
- Sun Cap or Wide-Brimmed Hat: UV exposure climbs roughly 10% for every 1,000m of elevation gain, so sun protection matters more here than it would at sea level.
- Sunglasses with Full UV Protection: This is one of the most skipped items on generic packing lists, and one of the most regretted omissions. Fresh snow reflects up to 80% of UV rays; without proper glasses above the snowline, you risk snow blindness, a genuinely painful, if temporary, condition. Wraparound or glacier-style glasses that block light from the sides are worth the extra cost.
- Liner Gloves: Thin enough to wear while actively trekking and still operate a camera or zipper.
- Warm Fleece-lined or Waterproof Outer Gloves: For mornings and evenings above 3,000m.
- Wool or Synthetic Socks (4–5 pairs): Merino is the most comfortable option. A thin liner sock underneath your main trekking sock cuts friction and is one of the cheapest ways to avoid blisters.
- Underwear and Sports Bras: Bring enough for the full trek; laundry service on the trail is limited and gets pricier the higher you go.
- Gaiters: Low-profile gaiters keep grit, mud, and light snow out of your boots on the dustier lower sections and the icier upper ones. Not essential in every season, but genuinely useful in winter or after fresh snowfall.
Footwear and Sleeping Gear for Annapurna Circuit Trek
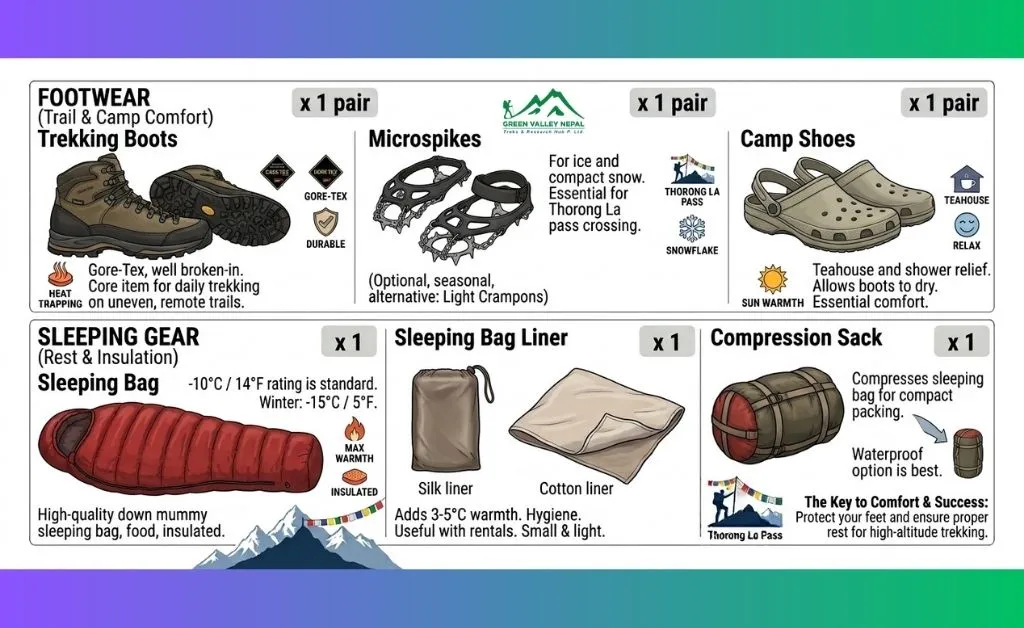
Trekking boots
Waterproof boots with firm ankle support and a grippy sole are the foundation of this entire trek. The trail crosses rocky riverbeds, narrow ridgelines, wet stone staircases, and suspension bridges that sway more than first-timers expect; ankle support matters on all of it, every day.
Microspikes or Light Crampons
If you are trekking between late November and March, or if there’s been recent snowfall at elevation, the stretch from Thorong High Camp to the pass summit can genuinely ice over. Microspikes, lightweight chain-and-rubber traction devices that stretch over your boots, weigh almost nothing, take up minimal space, and meaningfully change both your safety margin and your confidence on an icy morning. In winter, treat them as essential, not optional.
Camp Shoes
After 6–8 hours in boots, your feet need a break, and your boots need to dry out overnight. A light pair of sandals, Crocs, or trainers for the teahouse is worth the small weight cost.
Sleeping Bag
Teahouses supply blankets, but quality and warmth vary a lot from lodge to lodge (our teahouse and accommodation guide breaks down what to expect at each stop), and above 3,500m, blankets alone usually aren’t enough. A personal sleeping bag rated to at least -10°C is the recommended minimum for three-season trekking; for winter, move up to a -15°C or -20°C bag.
If you don’t trek often and don’t want to buy one, renting in Kathmandu or Pokhara is a completely reasonable choice; expect to pay roughly USD 30 for the full trek. Check the zip and the loft of a rental bag before you leave the shop; a rental with matted-down insulation won’t perform anywhere near its rated temperature.
Sleeping Bag Liner
A silk or fleece liner adds a few degrees of warmth and keeps a rented or personal bag clean over multiple nights. It’s light, packs down to nothing, and is worth carrying regardless of whether you own or rent your bag.
Compression Sack
An easy item to forget until your duffel won’t zip closed. Winter-weight down bags are bulky; a dedicated compression stuff sack shrinks yours down and frees up real space for everything else. Most quality sleeping bags include one; if yours didn’t, they are inexpensive to buy separately in Thamel.
Trekking Essentials for Annapurna Circuit Trek
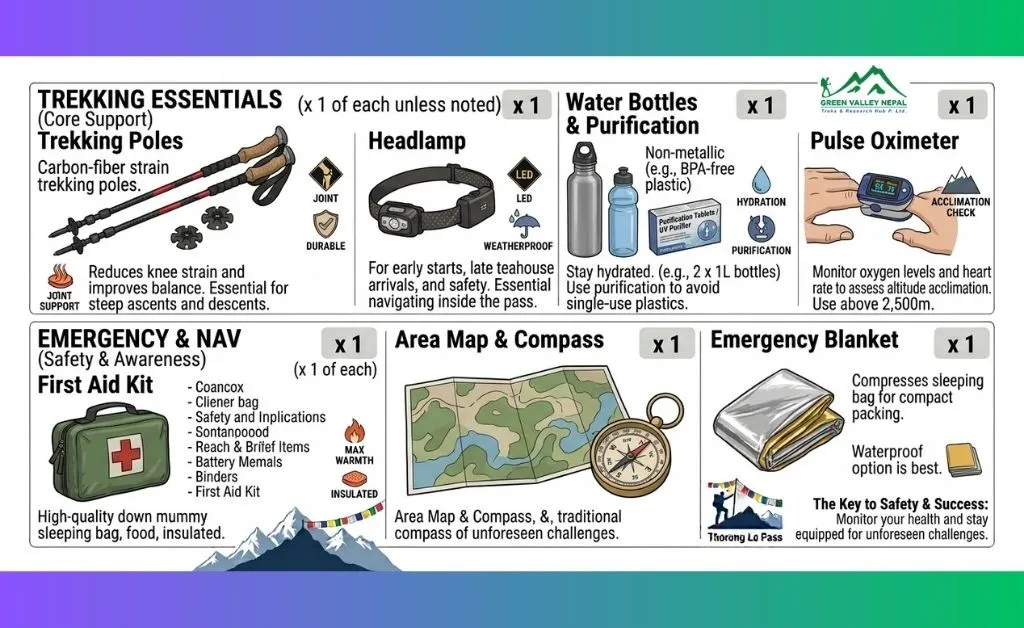
Trekking Poles
If you only ever use poles on one trek in your life, make it one with a major pass crossing. Thorong La involves a long, steep pre-dawn ascent followed by an even longer descent to Muktinath on tired legs. Poles absorb knee impact on the way down, add stability on icy or loose ground, and help you settle into a steady rhythm on the climb. Hiring a pair in Pokhara or Kathmandu costs only a few dollars a day, so there’s little reason to buy unless you trek regularly.
Headlamp
Essential, not a backup. The Thorong La crossing typically starts at 3:00–4:00 am to summit before the afternoon weather rolls in, meaning two to three hours of walking in full darkness on the hardest day of the trek. Teahouse power is unreliable, and shared outdoor toilets in the dark are far easier with both hands free. Carry spare batteries or a rechargeable model, and don’t rely on your phone torch; cold temperatures drain phone batteries fast, and you will want your phone charged for the summit photo.
Water Bottles and Purification
Carry at least 2 litres of capacity; a hydration bladder with a drinking tube suits steady walking without stopping. Above 3,000m, aim to actually drink 3–4 litres a day; dehydration accelerates altitude symptoms, and it’s one of the easiest problems on this trek to prevent simply by sipping steadily instead of waiting until you are thirsty.
Purification tablets or a filter straw (a LifeStraw or similar) let you refill from streams and taps rather than relying on bottled water, which cuts plastic waste on a trail that already has a litter problem in its busier sections.
Pulse Oximeter
A small clip-on device that reads your blood oxygen saturation, and genuinely one of the most useful items on this entire list. At altitude, your SpO2 reading gives you objective data on how well you are acclimatising, often before symptoms become obvious. A reading that keeps dropping, or sits persistently below about 80%, is a real warning sign, not something to push through. These devices cost around USD 20–30, weigh next to nothing, and can genuinely change a decision about whether to take an acclimatisation day.
First Aid Kit Contents
- Ibuprofen and paracetamol for pain and fever
- Diamox (acetazolamide), if prescribed
- Oral rehydration salts and electrolyte tablets
- Loperamide (Imodium) for stomach upsets
- Antiseptic wipes and cream
- Plasters and blister treatment (moleskin or hydrocolloid pads)
- Elastic knee or ankle support bandage
- Anti-inflammatory cream for muscle soreness
- Any personal prescription medication, packed in sufficient supply for the full trip plus a buffer
The rule our guides repeat on every trip: if symptoms are getting worse and rest isn’t helping, descend. No pass, no lake, no photo is worth pushing through worsening AMS. For a full breakdown of symptoms, prevention, and what your guide is watching for, see our altitude sickness prevention guide.
It’s also worth arriving reasonably fit. You don’t need to be an athlete, but the Thorong La day is a single push of over 1,000m of ascent followed by a 1,600m descent. Our guide to preparing for trekking in Nepal has a realistic training timeline if you are starting from scratch.
Additional Essential Equipment for Annapurna Circuit Trek
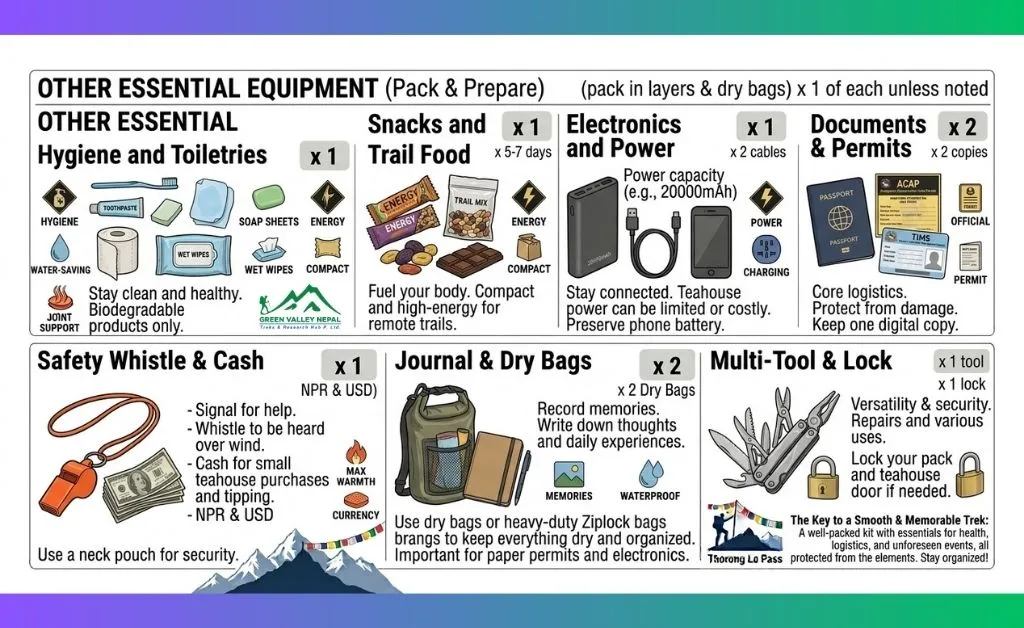
Hygiene and Toiletries
Hot showers are available at teahouses in the lower sections for a small fee; higher up, hot water often comes in a bucket instead. Worth packing: a compact microfibre towel, biodegradable soap and shampoo, toothbrush and toothpaste, your own toilet paper (don’t rely on teahouses to supply it), wet wipes for the days between proper washes, hand sanitiser, and sunscreen SPF 50+.
Lip balm with SPF is the item almost everyone underpacks and then regrets; dry mountain air cracks lips within days, and one small tube rarely lasts the full trek. Feminine hygiene products aren’t reliably available on the upper circuit, so bring everything you will need from home or Kathmandu. Earplugs are a small addition that make a real difference in shared-wall teahouse rooms.
Snacks and Trail Food
Energy or protein bars, dried fruit and nuts, electrolyte drink sachets, and something sweet for a quick lift on the final push to Thorong La; ginger candies in particular help settle a queasy stomach at altitude. Choose things that survive being crushed in a pack for a week; anything that turns to crumbs by day four isn’t worth the space.
Electronics and Power
Charging is available at most teahouses but usually costs a small fee per device, and sockets in the dining room can be limited to one or two outlets shared by the whole room. A power bank rated 10,000–20,000mAh covers most trekkers comfortably. Nepal uses Type C, D, and M sockets at 230V; bring a universal adapter rather than assuming your home plug will fit.
Download offline maps (Maps.me or Gaia GPS both work well) before you leave Kathmandu. Most of the lower circuit has Ncell or NTC signal, but coverage thins out fast on the upper sections; don’t count on having a signal at Thorong High Camp. Regarding network coverage and internet, you can go through our blog on wi-fi and internet access in the Annapurna region.
Documents and Permits
Two permits are required for the Annapurna Circuit: the ACAP (Annapurna Conservation Area Permit, around USD 30) and the TIMS (Trekkers’ Information Management System) card (around USD 17–20). If you are trekking with an operator, this is handled for you; independent trekkers need to arrange both in Kathmandu or Pokhara before starting, and should bring four passport-sized photos for the applications. A Nepal tourist visa is separate and available on arrival at Tribhuvan International Airport; 15-, 30-, and 90-day options are priced differently, so check current rates before you fly.
Keep your passport, permits, and insurance documents together in a waterproof zip-lock bag inside your daypack, not buried in your duffel. Travel insurance is not optional; your policy needs to explicitly cover trekking above 5,000m and helicopter evacuation, since standard travel insurance often caps out well below Thorong La’s altitude.
Cash
There are no functioning ATMs beyond Chame on the main circuit route. Most trekkers spend somewhere in the USD 20–40 per day range on personal extras: device charging, hot showers, Wi-Fi, snacks, and guide/porter tips, on top of whatever your package already covers, so budget accordingly and carry enough Nepali rupees from Kathmandu or Pokhara to cover the whole trek plus a buffer for the unexpected. A local SIM card (NTC or Ncell, both widely available in Kathmandu) is worth picking up before you leave; coverage holds up surprisingly well through the lower and mid circuit, even if it thins out above Manang.
Extras worth the Weight
A few small items that rarely make generic packing lists but consistently earn their space in a trekker’s pack:
- Dry Bags or Heavy-Duty Ziplock Bags: For electronics, documents, and anything you can’t afford to have get wet, separate from your rain cover as a backup layer.
- Multi-Tool or Small Pocket Knife: For gear repairs, food prep, or the dozen small tasks that come up on any multi-week trip.
- Duct Tape (A Small Wrapped Length, Not the Full Roll): The fastest fix for a torn pack, a blown-out boot sole, or a cracked pole.
- Safety Whistle: Clipped to your pack strap, useful in the unlikely event you get separated from your group in poor visibility.
- A Journal or Notebook: A genuinely useful item on a trek this long; days blur together after two weeks, and a page a night is enough to keep the details from disappearing.
What Not to Pack
Every unnecessary item is weight you personally carry, or ask your porter to carry, up every staircase on the route.
- Skip anything that takes more than a few hours to dry; this rules out most cotton clothing.
- One pair of camp shoes is enough.
- You don’t need a separate windbreaker if your rain shell is already windproof.
- Heavy DSLR camera kits are rarely worth their weight unless photography is the actual point of your trip.
- A modern smartphone handles most of what people want from trek photos.
- You are sleeping in teahouses every night on this route, not camping, so leave the sleeping mat, air mattress, and any cooking equipment at home.
What to Buy or Rent in Nepal
You don’t need to arrive with everything already in your bag. Kathmandu’s Thamel neighbourhood and Pokhara’s Lakeside both have well-stocked trekking gear markets, and rental gear here is generally solid quality.
- Reasonable to rent or buy locally: trekking poles (a few dollars a day), sleeping bag (~USD 30 for the trek), down jacket, fleece, trekking trousers, gloves, buffs, gaiters.
- Bring from home: your trekking boots, already broken in, microspikes, any personal medications, and anything where fit has to be exact.
Packing by Season
- Autumn (September–November) is the most popular window, with stable weather and clear skies. The standard packing list above applies in full; a broad-brimmed sun hat and high-SPF sunscreen matter more than most people expect, even in cooler air.
- Spring (March–May) brings rhododendron blooms to the lower valleys. Afternoon showers pick up by May, so waterproofs earn their keep, and the pass can still carry significant snow and ice early in the season.
- Winter (December–February) means thinner crowds and exceptionally clear air, but meaningfully colder conditions at every elevation. Upgrade to a -20°C sleeping bag, bring heavier insulated gloves, and treat microspikes as essential rather than optional. Some upper-circuit teahouses close entirely in deep winter; check ahead.
- Monsoon (June–August) demands daily rain gear and, on the lower trail, leech socks. The upper circuit above Manang sits in a rain shadow and stays comparatively dry, but reaching it through the lower valley means full waterproofs the whole way.
Tilicho Lake Extension: What to Add
Many trekkers extend the standard route to include Tilicho Lake (4,919m), reached on a side trip from Manang or Khangsar. If this extension is on your itinerary, add microspikes if you haven’t already packed them, confirm your sleeping bag is rated to at least -10°C, and pack extra sunscreen; the reflective snowfields around the lake significantly increase UV exposure. The trail to Tilicho also has a section prone to rockfall, where trekking poles add real stability on loose ground.
Other Ways to Extend the Circuit
The gear on this list covers the standard route, but a few common extensions change your packing slightly:
Final Thoughts
Getting the gear right is half the preparation; the other half is the itinerary, the acclimatization schedule, and having an experienced guide who knows exactly when to push on and when to call a rest day. The team at Green Valley Nepal Treks handles permits, porters, teahouse bookings, and the safest route across Thorong La Pass for every group we take out.
Contact us to start planning your Annapurna Circuit trek.
Frequently Asked Questions (FAQs)
- Do I need a sleeping bag for the Annapurna Circuit?
Yes. Teahouse blankets exist, but above 3,500m they’re frequently not warm enough on their own. A bag rated to -10°C is the minimum for three-season trekking, and rentals are widely available in Kathmandu and Pokhara for around USD 30.
- What should I pack for the Annapurna Circuit if I only have carry-on luggage?
Lean on merino base layers (they pack small and go multiple days without washing), a packable down jacket, a lightweight waterproof shell, and rent your sleeping bag and poles once you’re in Kathmandu or Pokhara. Wear your boots on the flight over to save bag space. A disciplined 40-litre carry-on can technically cover the essentials.
- How cold does it actually get on the Annapurna Circuit?
In peak autumn and spring, nights at Thorong High Camp (4,994m) can fall to -10°C or colder. Manang (3,500m) regularly drops to around 0°C or slightly below on clear nights, even in October. Meanwhile, lower-circuit days in the lodge season can hit 25–30°C. Layering for that full range is the entire point of this packing list.
- Do I really need gaiters and microspikes, or are they optional extras?
In autumn and spring under normal conditions, gaiters are a nice-to-have. If you are trekking from late November through March, or there’s been recent snow, microspikes stop being optional; the icy stretch above Thorong High Camp is exactly where trekkers without them lose confidence and slow the whole group down.
- What are the most commonly forgotten items?
Based on what our guides get asked for on the trail: a pulse oximeter, microspikes for the pass crossing, sunglasses with real UV protection, a headlamp with fresh batteries, enough cash before Chame, offline maps downloaded before losing signal, and a copy of a digital or printed travel insurance policy.